Paleo Summer Recipe: Sriracha Coleslaw

IMG_0758If you haven’t noticed yet, I love making coleslaw. It’s pretty humorous considering I spent most of my life despising the stuff. Thank god I have seen the light because coleslaw is awesome, and I am currently obsessed with coming up with new varieties!

In fact, this entire spring so far I’ve only made one of my coleslaw recipes twice– and it’s this one! This Sriracha Slaw is creamy, tangy, spicy and sweet all at the same time. It was a big hit with the hubby when I first made it, and an even bigger hit with the crowd at my sister-in-law’s Memorial Day barbecue last weekend. As such, it has officially earned its place in the coleslaw hall of fame (aka this blog post).

IMG_1337

Here’s how you can make this in your kitchen:

  • 1 bag coleslaw mix (while bag sizes can vary, a standard bag usually has 16-24 oz)
  • 3 tbsp. mayo
  • 1 tsp. sriracha sauce
  • 2.5 tsp apple cider vinegar
  • 1 tsp. coconut aminos (or gluten-free soy sauce)
  • 1 tsp. honey
  • 3 tbsp. scallions, sliced thin
  • 1/2 tsp. sesame oil
  • salt and pepper, to taste

1. Combine all ingredients (except the coleslaw mix) in a small bowl, whisking until smooth.

2. Add the coleslaw mix to a large bowl and add the sauce to the vegetables. Stir to coat all of the vegetables evenly. Add salt and pepper to taste.

3. Eat and enjoy!

IMG_1334

Is this not the simplest recipe ever? And trust me, it’s super good! It’s the perfect summertime side dish for grass-fed hot dogs and burgers, or any grilled meat. Leftovers also make a great addition to lettuce wraps and salads!

Try this out and let me know what you think!

Paleo Roasted Gazpacho Recipe

IMG_0758It doesn’t matter how much I love to create new recipes and cook delicious meals, if it’s 90 degrees in my house, I DO NOT want to be doing anything over the stove. So last night, when I encountered just such the situation, I decided to make one of my favorite meals from my time studying abroad in Spain: gazpacho, a tomato soup served cold.

To add a twist to the traditional gazpacho recipe, I decided to make a roasted version, roasting every ingredient that went into the soup. This was a super simple and really delicious recipe that is great for summer! Try it out, and make it your own, adding in other veggies and spices that you like.

DSC_7547

Here’s how to make this in your kitchen:

  • 9 plum tomatoes, sliced in half and seeds removed
  • 1 head garlic, top sliced off to expose the cloves
  • 1 yellow bell pepper, seeds removed and chopped in thick slices
  • 1/2 sweet onion, sliced thick
  • 1 jalapeno, cut in half and seeds removed (if you like your food spicier, feel free to leave the seeds in!)
  • 2 dashes Worcestershire sauce
  • salt and pepper to taste

1. Preheat your oven to 400 degrees. Prepare the veggies while the oven is baking, placing the tomatoes on one baking sheet and the jalapeno, pepper and onion on another. Wrap the head of garlic in tinfoil, pouring a bit of olive oil on the exposed cloves before wrapping it up.

2. Roast the tomatoes in the oven for about 30 minutes. Roast the peppers, onion and jalapeno for about 35-40 minutes, and the garlic 40-45 minutes. ***Oven temps can vary, so just watch all of the veggies carefully and remove them when they are soft and slightly blackened.

3. Once all of the veggies are done roasting, place everything into a food processor or blender. The roasted garlic should be soft enough to simply squeeze the head of garlic at the bottom, squeezing out the cloves inside. Blend all of the veggies together until smooth. Add two dashes of Worcestershire sauce, salt and pepper to taste and blend again. ***If the soup seems too thick, you can add water to the soup a little at a time. I added about 1/4 cup to mine.

4. Place the soup in the fridge or freezer (if you’re as impatient as I am!) until cool. Then serve with fresh herbs of your choice and a drizzle of olive oil!

Let me know if you try this recipe and what you think! We LOVED it! It has a subtle sweetness from all of the roasted vegetables, and a slight spice from the jalapeno. We added some cilantro to the top of ours, but basil, dill and basically any other herb would taste great!

Grain-free, Paleo Bacon Bourbon Cinnamon Rolls

IMG_0758
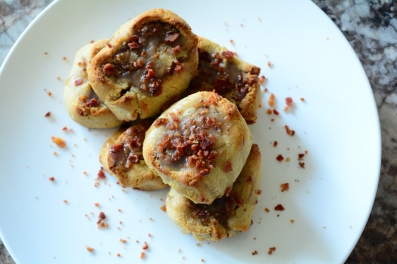
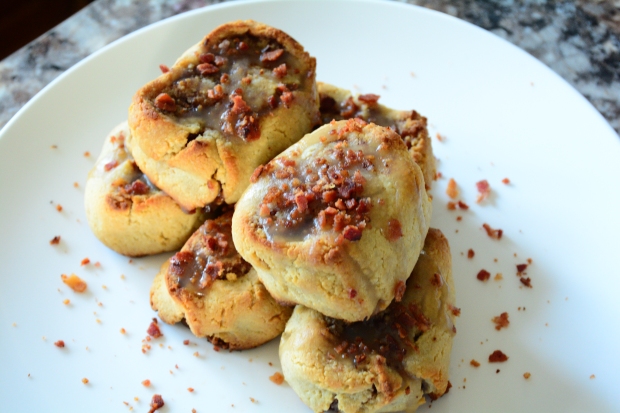
Yes, you read that title right. No, this is not some kind of mean joke. Bacon makes everything better, right? Well, so does bourbon. That’s why I made these Bacon Bourbon Cinnamon Rolls.

Last Friday while doing my weekly afternoon brainstorming for weekend cooking ideas, I began having a craving for a sweet breakfast treat. This is very unlike me, as I’m usually much more focused on egg-based breakfast dishes. But the nagging desire for some cinnamon and honey wouldn’t go away.

Not one to move away from savory flavors all together at breakfast time, I started thinking of ways that I could get some sweet and some savory into my weekend meal. Bacon, I thought. Bacon makes everything better. That’s when I remembered the bottle of bourbon sitting in our liquor cabinet and everything came together. Angels sang, doves flew out of heart-shaped boxes and the idea for these Bacon-Bourbon Cinnamon Rolls came to fruition.

But enough of my blabbing, make these already!

DSC_6982

Here’s how you can make these in your kitchen:

  • 1 3/4 cups finely ground blanched almond flour
  • 1/4 cup coconut flour
  • 1/2 tsp. sea salt
  • 1/4 cup coconut oil or ghee, softened
  •  2 Tbsp. raw honey, softened
  •  2 large eggs, room temperature
  •  1 Tbsp. vanilla extract

For the filling:

  • 2 Tbsp.  raw honey
  • 2 Tbsp. pure maple syrup
  • 2 Tbsp. coconut oil or ghee
  • 2 Tbsp. ground cinnamon
  • 2 strips bacon, crumbled

For the glaze:

  • 1 Tbsp. coconut butter
  • 2 Tbsp. pure maple syrup
  • 1 tsp bourbon
  • 1-2 strips bacon, crumbled

Directions:
1. Preheat the oven to 350F.

2. In a medium bowl, whisk together the coconut oil,  honey, vanilla and eggs.

3. In a large bowl, combine the almond flour, coconut flour and salt and mix until smooth.

4. Add the egg mixture to the flour mixture and knead the dough until it is smooth. (If the dough is too wet, you can add 1 tsp. coconut flour at a time until it reaches your desired consistency. Cool the dough in the fridge for about 15 minutes.)

5. Mix the coconut oil, honey, maple syrup and cinnamon together in small bowl and set aside for the filling.

6. Now it’s time to roll out the dough! Place the dough in between two sheets of parchment paper and use a rolling-pin to roll it out into a large rectangle. (You want the dough to be about 1/4 inch thick. Try to get the shape as close to a rectangle as possible, as this will make forming the rolls easier. You can even cut the dough and reshape it as needed.)

7. Drizzle the filling evenly over the dough, using a spoon or basting brush to spread it across the dough. Sprinkle two strips of crumbled bacon evenly over the filling (and more if you wish!).

8. Roll the dough, starting at one of the shorter ends, until it forms a log. Work slowly and make sure the dough does not crack. (I have found that using the bottom sheet of parchment paper to roll the dough works really well.) 

9. Slice the dough log into 2-inch thick sections using a large chef knife. You should have about 7-9 rolls. Lay each piece (flat side down) on a baking sheet lined with parchment paper and press down slightly on the top to ensure the roll stays together while baking.

10. Bake 15-20 minutes or until the tops are lightly browned. (Mine took about 17 minutes.) Watch them closely– the more gooey the inside is, the better!

11. Let the rolls cool slightly before topping with the glaze. To make the glaze, combine the coconut butter, maple syrup and bourbon in a small bowl and mix to combine. (You may need to heat this slightly in the microwave to get it smooth.)

12. Drizzle the rolls with the glaze and top the rolls with the remaining two strips of crumbled bacon. THEN EAT THEM ALL!

These were seriously amazing, and would make a great addition to a Father’s Day brunch or basically any other morning meal. Try them out and let me know what you think!
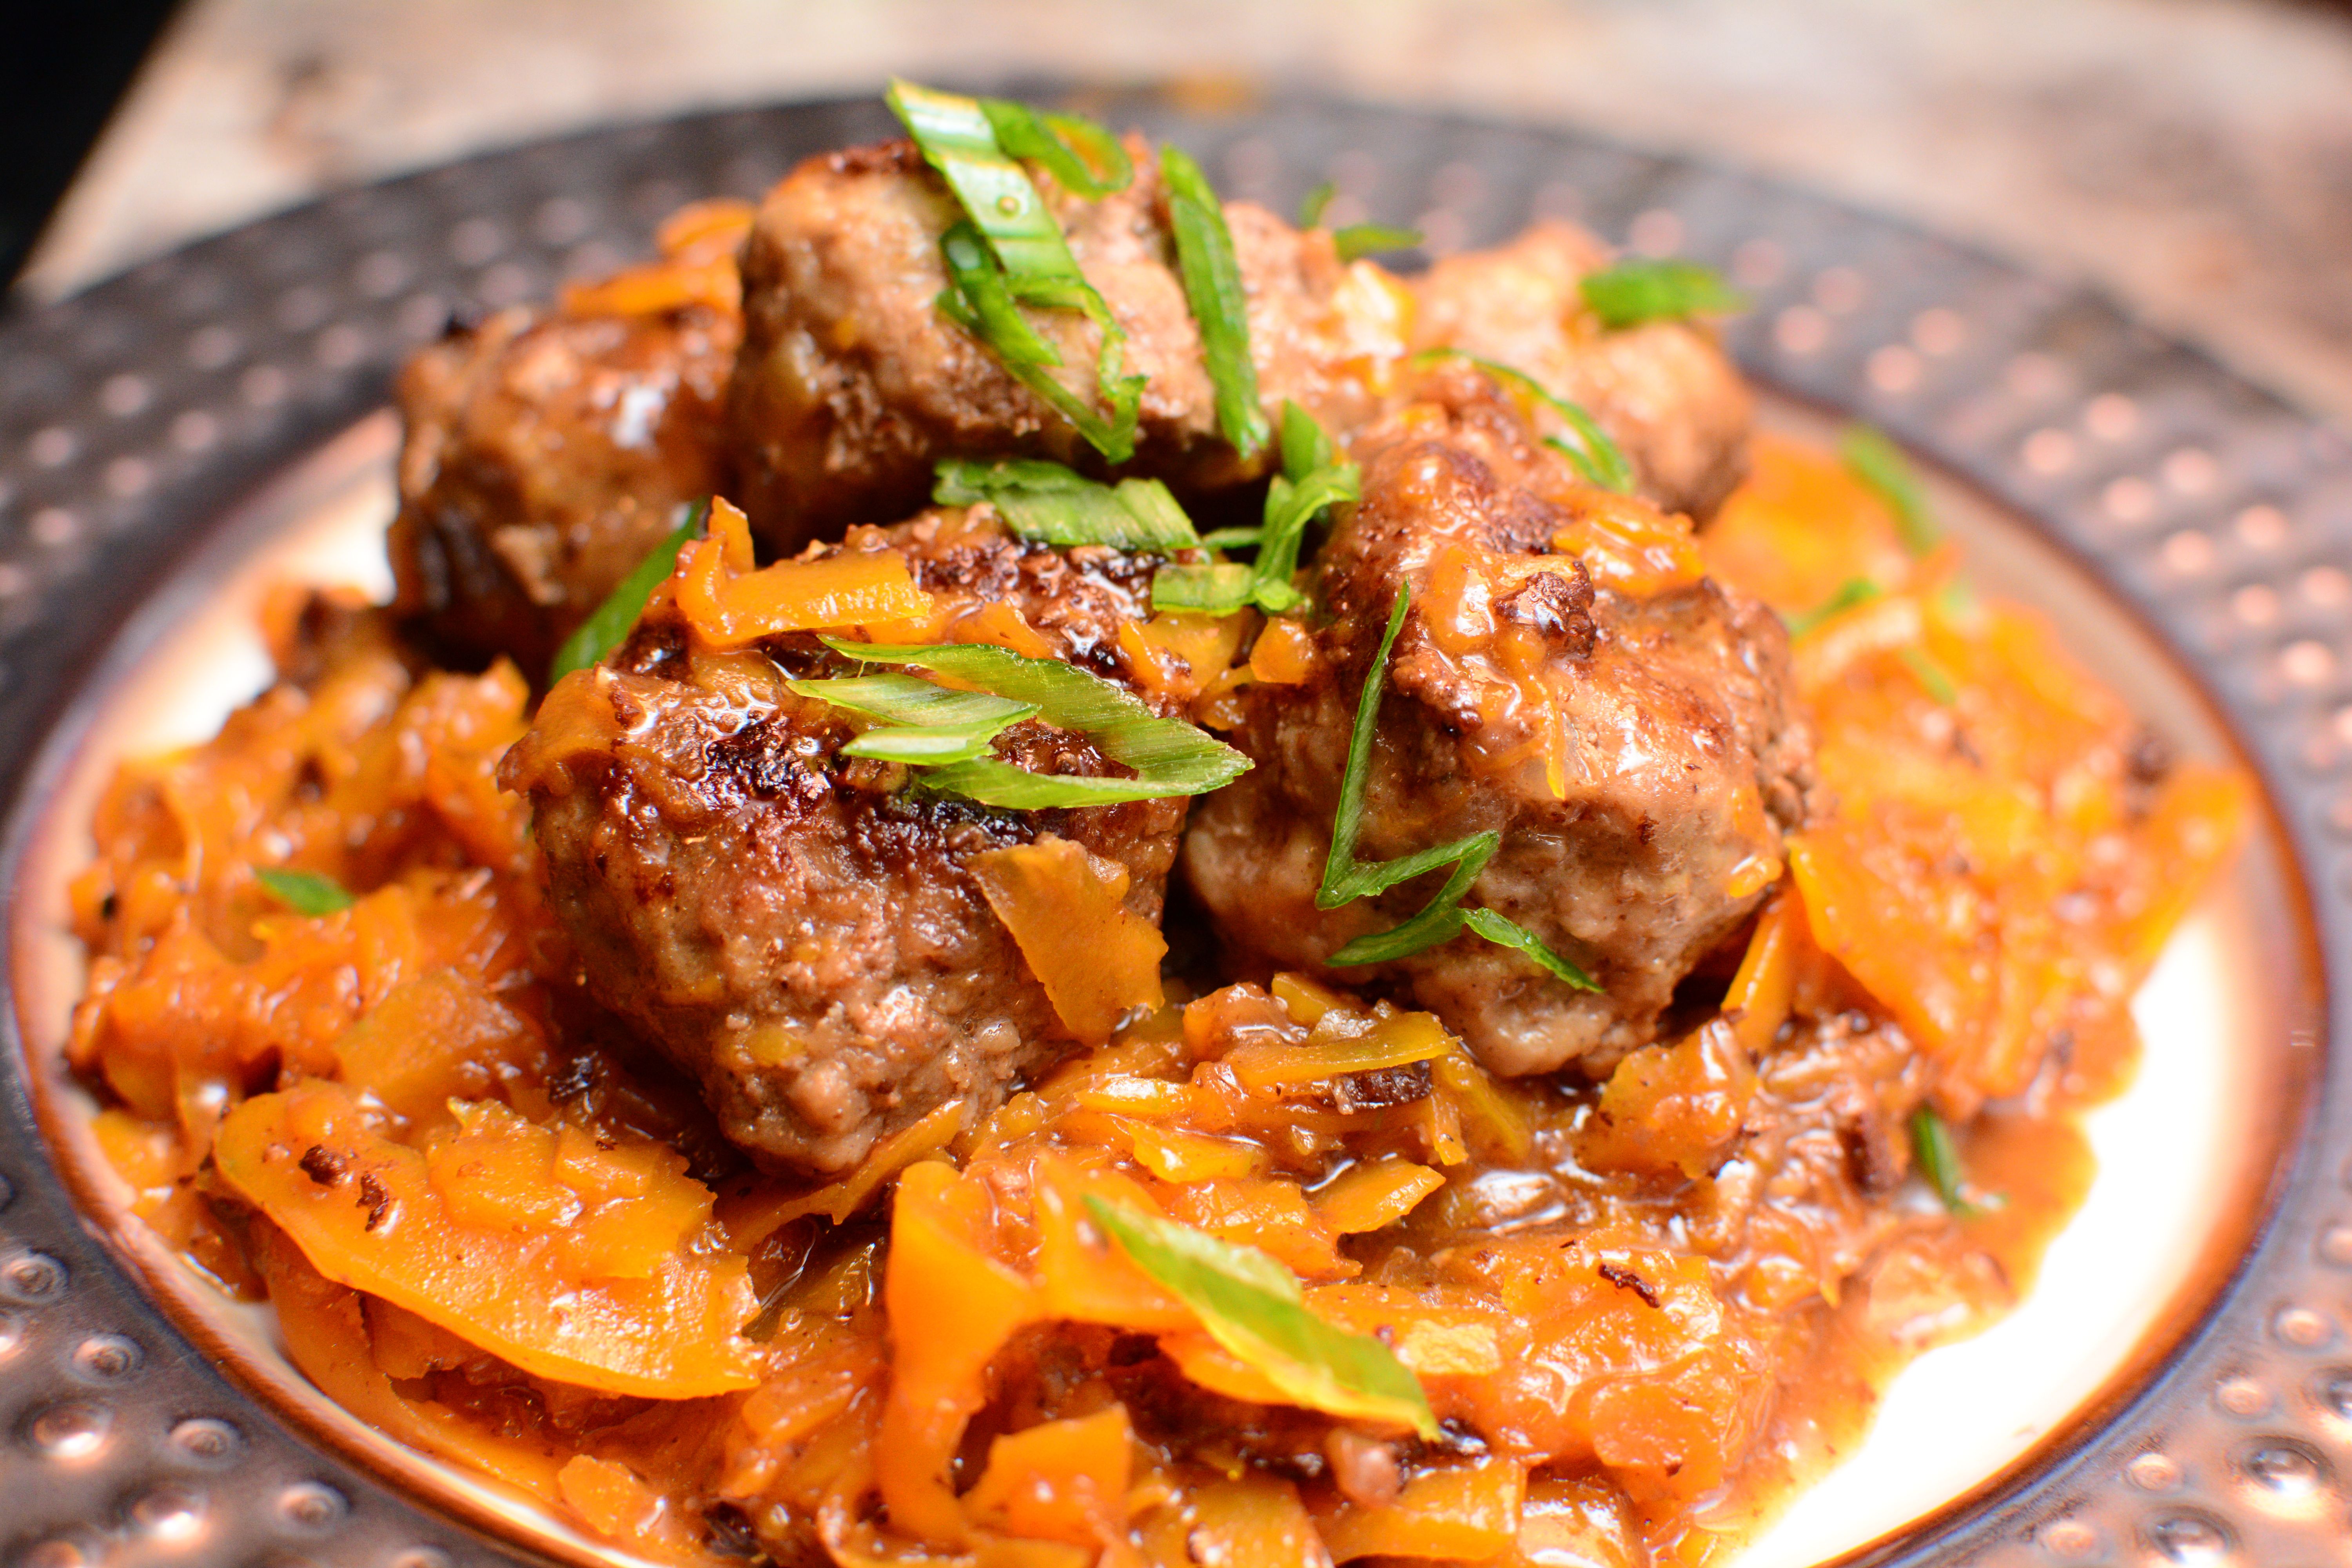
DSC_6984

The Paleovangelist Column: First Addition!

NutritionAs many of you already know, I am expanding the reach of The Paleovangelist to a local newspaper! I am incredibly grateful to have this opportunity, sharing my paleo recipes, nutrition tips and paleo lifestyle musings with the New Hampshire community.

My first paleo cooking column went live yesterday, May 21, in the Nashua Telegraph newspaper and online. In my introductory column, I explore how I came to the paleo lifestyle, the concerns and challenges I faced when I started, and how I overcame these challenges.

I’ve also shared one of my favorite recipes: Honey Sriracha Meatballs!

Stay tuned for my next column, which will go live on Thursday, June 18! Thanks for all of the support so far!

Paleo Swedish Meatballs Recipe

IMG_0758My brain does the same thing every Friday around noon: it starts thinking less about work and more about the food I can make over the weekend. I start researching traditional recipes online that I can make over into paleo versions. I write recipe ideas into a small notebook I keep with me pretty much all the time, and I start developing grocery lists of items to purchase later.

This Friday, this dreaming and research led me to one of my best recipe creations yet (if I do say so myself): Paleo Swedish Meatballs! Seriously guys, these were so real deal I almost couldn’t believe that they were entirely grain- and dairy-free. Move over Ikea, these balls are off the hook.

I used the traditional flavors of Swedish meatballs, but held the meatballs together with arrowroot powder instead of the traditional white bread and milk, and made a beef gravy with thick coconut milk instead of cream. We served the meatballs over butternut squash noodles and it was pure Swedish heaven.

Swedish Meatballs

Here’s how you can make these in your kitchen:

  • 1 lb ground beef
  • 1 lb ground pork
  • 1/4 sweet onion, diced finely
  • 1 tbsp butter, ghee or olive oil
  • 2 cloves garlic, minced
  • 2 eggs, beaten
  • 3 tbsp arrowroot powder
  • 1/4 tsp garlic powder
  • 1/4 tsp nutmeg
  • 1/4 tsp all-spice
  • 1 tsp Worcestershire sauce
  • salt and pepper, to taste

1. Preheat your oven to 200 degrees (this will be used to keep the meatballs warm) Melt the butter in a sauté pan over medium-high heat, then add the onion and garlic to the pan. Cook, stirring, until the onion and garlic have softened and browned, about 3-5 minutes.

2. Add the onion mixture and all of the other meatball ingredients into a large bowl, mixing together with your hands to combine fully. Once the mixture is well combined, roll the meat into small meatballs, about 1-2 inches across. The mixture should make about 30 meatballs.

3. Place the meatballs in a large sauté pan over high heat and cook, turning to brown on all sides, until they are cooked through, about 10 minutes. Place the meatballs in a baking dish and put them into a 200-degree oven to stay warm. Save the pan used to cook the meatballs (meat scraps and brown bits and all!)

For the sauce:

  • 1 tbsp butter
  • 3 cups beef broth
  • 1 tbsp arrowroot powder
  • 1/2 tsp Worcestershire sauce
  • 3 tbsp coconut milk (this works best if you use canned coconut milk and DON’T mix it up, scooping your tablespoons from the top where the thickest part of the milk settles)

1. In the same pan used to cook the meatballs, melt the butter over medium-high heat and, using a whisk, lift up the brown bits from the bottom of the pan. Meanwhile, use a large liquid measuring cup to combine the beef broth, Worcestershire sauce and the arrowroot powder, whisking until the arrowroot has fully dissolved.

2. Add the broth and arrowroot mixture to the pan, stirring to combine. Increase the stove temperature and bring the liquid to a boil over high heat, letting it cook until it begins to reduce, about 3-5 minutes. Then, add the 3 tbsp coconut milk to the pan and stir to combine. Reduce the heat to medium-high.

3. Continue to cook the broth mixture, uncovered and whisking frequently, until it thickens and reaches your desired consistency for the gravy. (Mine took about 5 additional minutes.) Once the gravy has reached a good consistency, turn off the heat and add the meatballs back into the pan, tossing to coat.

The meatballs can be served as is, or served on top of some kind of vegetable noodle, cauliflower rice or mashed potato. We used butternut squash noodles (made using our spiralizer) and boiled them for a few minutes while the gravy was cooking, tossing them in with the meatballs at the end to be coated in the sauce.

Swedish Meatballs 2

This was seriously amazing! Let me know if you try this recipe and what you think of it!

The Paleovangelist Is Going to Print!

NutritionThe last few months of blogging have been so much fun! I love the digital format and love being able to share my work with readers around the world, through the blog and through social media.

But today I am happy to announce that The Paleovangelist is going to print! Beginning next week, I’ll be writing a monthly column for The Telegraph newspaper, bringing my recipes, nutrition tips and lifestyle musings to thousands of readers in New Hampshire.

I feel incredibly blessed to be able to continue “spreading the good food” with a whole new audience and look forward to seeing what comes of this exciting new opportunity!

You can read my columns every third Thursday of the month, both in print and online. I’ll be sharing some of my favorite recipes, writing about the paleo lifestyle and also exploring local New Hampshire farms, butchers and gluten-free, organic food producers that are doing great things!

Thanks for all of the support so far, and for your continued support of the blog!

Curry-Spiced Eggs in Purgatory with Spaghetti Squash

IMG_0758I’ve been crazy busy at work the last couple weeks, and while I’ve made plenty of time to cook, I haven’t made time to write up the recipes! I’m finally getting my act together tonight, and hope to share a few more from the last week or so over the next several days.

I knew I was going to have to work all night tonight (I know, it’s FRIDAY, but ad campaigns don’t make themselves!), so I wanted to make something for dinner that would be simple, but delicious, and would power through some late hours of getting sh** done!

I had been thinking for a while about making over one of my favorite recipes from Mediterranean Paleo Cooking: Eggs in Purgatory. This dish is often served for breakfast, and consists of eggs poached in tomato sauce. But I had a feeling it would make a great “pasta” dish, and boy was I right!

Tonight I made the recipe my own, adding turkey sausage, curry, coriander and red pepper flakes to the tomato sauce, poaching two eggs in the sauce, and pouring it all over spaghetti squash. It. Was. Glorious. (if I do say so myself!)

IMG_0787

Here’s how you can make this in your kitchen (makes 3 servings):

  • 2 tbsp olive oil (or other cooking fat)
  • 2 gloves garlic, minced
  • 1 bell pepper, diced
  • 3 links sausage (casings removed), or 1/2 pound ground sausage
  • 2 (13.7-oz) boxes (or two 14 oz. cans) crushed tomatoes
  • 3 cups kale (or other leafy green), chopped
  • 1 tsp red pepper flake
  • 1 tsp curry powder
  • 1 tsp coriander
  • 1 tsp balsamic vinegar
  • 2 tbsp capers
  • salt and pepper, to taste
  • 1 whole spaghetti squash, prepared
  • 3 eggs

1. Heat the olive oil in a large saute pan over medium-high heat. Once the oil is hot, add in the garlic and cook, stirring, until the garlic is fragrant, or about 1 minute. Add in the diced bell pepper and cook, stirring occasionally, until the pepper begins to soften, about 3 minutes.

2. Add the sausage to the pan and cook, crumbling the meat, until it is cooked through, about 3 minutes. Add the crushed tomatoes and kale (or other leafy greens) to the pan, stirring to combine. Add the red pepper flake, curry powder, coriander, balsamic vinegar, capers and salt and pepper, to taste, and stir.

3. Reduce the heat to medium-low and simmer the sauce and vegetable mixture for 3-5 minutes. Then, make three wells in the sauce and vegetable mixture and crack one egg into each well. Cover the pan and cook over medium-low heat until the eggs are cooked through to your desired texture, about 3-5 minutes.

4. To serve, place some prepared spaghetti squash onto each of three plates and top with one poached egg and a third of the sauce. We topped ours with minced green onions, but this would be great with some Parmesan or feta cheese, too, if you tolerate dairy.

5. EAT AND ENJOY!

Let me know if you try this out! We absolutely loved it!

IMG_0779